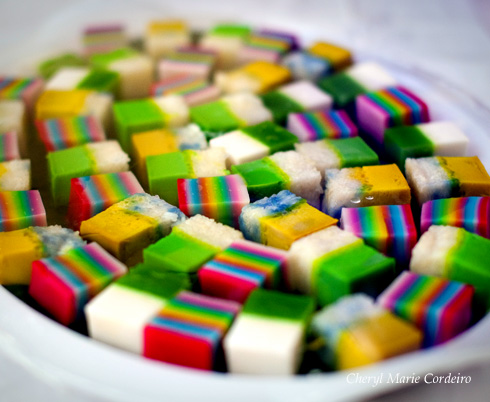
Various Nonya kueh kueh.
Photo for CMC © Kevin D. Cordeiro 2009
As a child, I’ve always looked forward to going to the wet market on Sundays in Singapore. The walk to the market was pleasant, where we would often meet neighbours who were themselves either on the way to the market or back. A curious gift I often received from a very old lady back then whenever she saw me, was a piece of ginger.
A hawker center is often connected to the wet market, providing a convenient place to both eat and market. And before buying the week’s groceries, it was breakfast, where I found that the colourful bit of kueh lapis usually sold at Nonya stalls, never failed to attract my attention. Most of all, I enjoyed peeling off its tapioca layers one by one, eating it according to colour.
These colourful cakes are still common in Singapore today, though I believe authentic recipes might be difficult to come by. I still love the sight of these festive morsels, as it brightens any event / party when served.
Like making layered agar agar, making this kueh lapis layer by layer is time consuming, so I’d recommend that you do this on a relatively languid day off.
What you’ll need for the Nonya kueh lapis is:
Utensils
-
7 inch square baking tin
A steamer that fits this baking tin
Ingredients Part I
-
50 g sifted rice flour
120 g sifted green bean flour
220 g sifted tapioca flour
300 ml coconut milk
150 ml water
Colouring of your choice (usually red and green)
Ingredients Part II
-
420 g sugar
300 ml thick coconut milk (can use fresh milk)
150 ml water
Method
Mix all ingredients in Part II and bring to a boil, stirring the sugar till it dissolves. Then, set aside.
Combine all ingredients in Part I, except the food colouring. Stir till the mixture is smooth and then pour in the boiled ingredients from Part II.
Divide this into 3 portions to be coloured. If there are more than 3 colours you’re going to use, then divide the portions accordingly. Colour each portion with the food colouring.
Lightly grease the baking tin and line with greaseproof paper, placing the tin in a steamer for a few minutes.
Once the tin is warmed, remove it from the steamer and pour about half a cup of the coloured batter (choosing whichever colour appeals to you first). Place the tin back into the steamer and steam for about 3-5 minutes. Once the layer has thickened, remove the tin and do the second layer, repeating the process until the steamed cake is done.
Timing in layering is important when making this cake, steamed too much inbetween layers, and the layers will not stick, steamed too little and the colours between layers will mix.
Once the last layer is poured, you could continue to steam the entire cake for another 10 – 15 minutes, ensuring that it’s steamed right through.
Let the cake cool thoroughly before slicing and serving in rectangular pieces.
Enjoy!